VOXL ToF Sensor User Guide
Table of contents
- Requirements
- Hardware
- Connect to VOXL
- Configure Cameras on VOXL
- Viewing the Data with voxl-portal
- Viewing the Data with ROS
Requirements
- VOXL or VOXL-Flight with VOXL System Image 3.2.0 or newer
- VOXL ToF Sensor (available here)
- If trying to visualize with ROS:
- Linux with Rviz
- Setup ROS on Host PC
- Setup ROS on VOXL
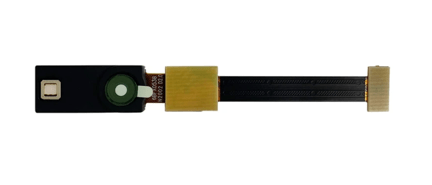
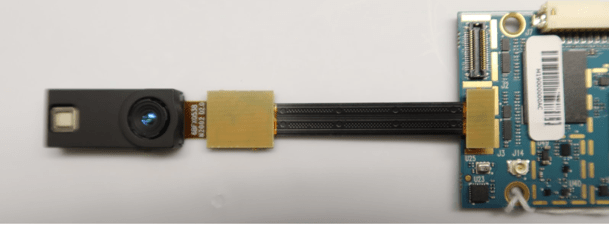
Hardware
- Ensure VOXL/VOXL-Flight is powered off
- Connect to VOXL/VOXL-Flight connector
J3as shown (orJ2if using concurrently with stereo cameras)
Connect to VOXL
Over ADB
adb shell
Over Wifi
- Setup and connect VOXL/VOXL-Flight
- SSH onto the target:
- VOXL IP will be 192.168.8.1 if in softap mode
- If in station mode, you will have to run
ifconfigon voxl to see what IP your network has assigned the voxl
ssh root@IP-ADDR-OF-VOXL
oelinux123
Configure Cameras on VOXL
On VOXL:
- Ensure the voxl is set up by running the following commands on voxl:
voxl-configure-cameras
Select the option that best fits your setup
Restart the camera server
systemctl restart voxl-camera-server
Viewing the Data with voxl-portal
Ensure that voxl-camera-server and voxl-portal are running with:
voxl-inspect-services
If either are not, start them with
systemctl start voxl-camera-server
or
systemctl start voxl-portal
Once they’re both running, open a web browser on a device connected to the same network as the drone, type in the drone’s IP, click on the camera dropdown, and select one of the tof images to be shown a page like this:
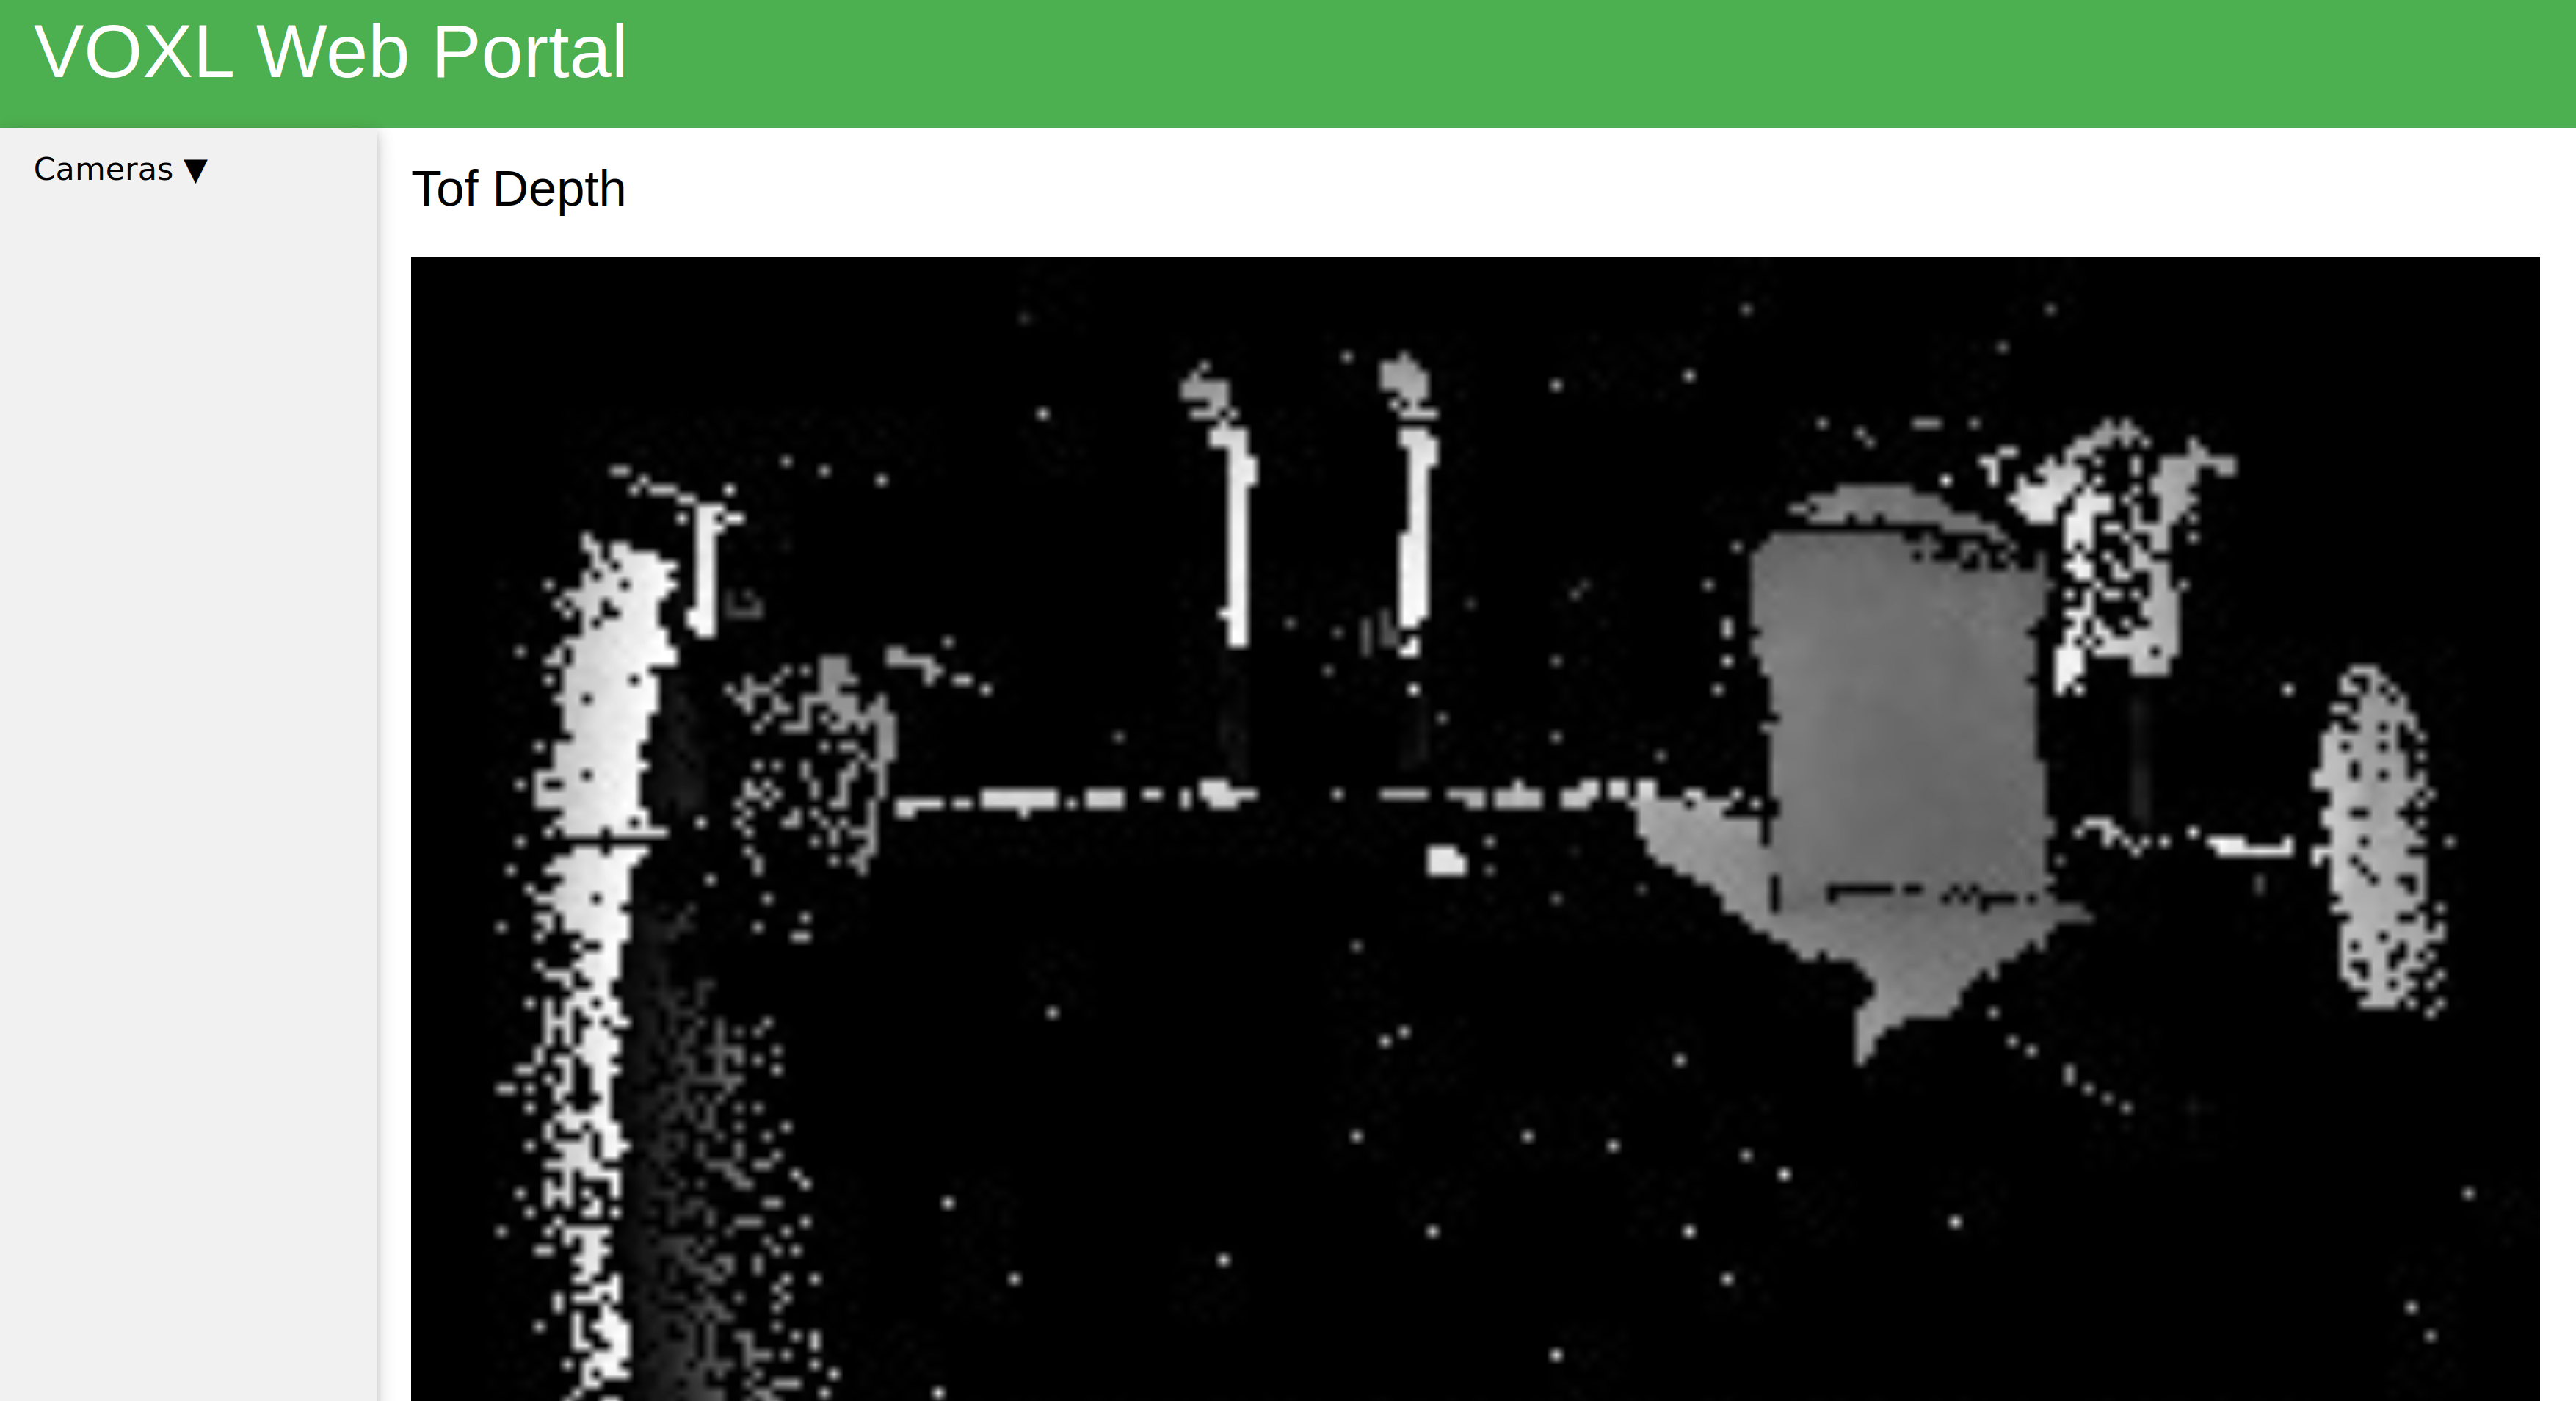
voxl-portal does not currently support viewing the 3d pointcloud, but this is in the works and should be available in the coming weeks!
Viewing the Data with ROS
Configure ROS on voxl
On VOXL:
# view network information
ifconfig
- This will give you the IP address of the VOXL, configure ROS by modifying the
/home/root/my_ros_env.shfile:
vi /home/root/my_ros_env.sh
exec bash
Configure ROS On Desktop
On Linux desktop:
- Find IP address
# view network information
ifconfig
- Configure ROS environment variables, where the ROS_MASTER_URI is what you saw on the VOXL
export ROS_IP=IP-ADDR-OF-PC
export ROS_MASTER_URI=http://AAA.BBB.CCC.DDD:XYZUV/
- source variables, where xxxxxx is the ROS version you have installed
source /opt/ros/xxxxx/setup.bash
Launch Node on VOXL
roslaunch /opt/ros/indigo/share/voxl_mpa_to_ros/launch/voxl_mpa_to_ros.launch
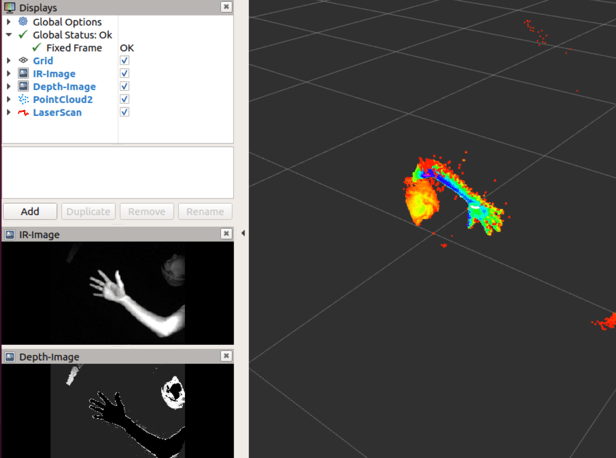
Launch RViz on Desktop
- On the host computer, run RViz
rviz
- On the leftmost column click on the “Add” button
- In the pop-up options click on “Image”
- Change Display Name to “IR-Image”
- In the left column under “IR-Image” tab select type in Image Topic as the TOF IR Image
- Click on the “Add” button again
- In the pop-up options click on “Image”
- Change Display Name to “Depth-Image”
- In the left column under “Depth-Image” tab select type in Image Topic as the TOF Depth Image
- “Add” PointCloud2 with TOF pointcloud topic