DTC User Guide (Community Supported)
Table of contents
Overview
*VOXL2 SDK 1.1.0 and Newer
VOXL and VOXL2 support the ability to quickly and easily add a DTC wireless connection to a Ground Control Station. The following guide provides you the necessary details to do so.
Below are some helpful links from DTC:
As this is a community supported modem the ModalAI team cannot provide direct support. Instead please direct questions to US.Technical.Support@domotactical.com or UK.Technical.Support@domotactical.com
Requirements
Hardware
The following ModalAI hardware is required to establish a DTC network connection between a VOXL-based product and a host device (computer, tablet, etc.).
| Part Number | Description | Link |
|---|---|---|
| MCCA-M0078 | VOXL USB Expansion Board v2 | Purchase |
| MCCA-M0041 | Power Module v3 | Purchase |
| M0006, M0019, or M0054 | VOXL, VOXL-Flight, or VOXL2 | Purchase links: VOXL2, VOXL-Flight, VOXL |
Software
In order for the required drivers to be available on target, the following software is required:
Hardware Setup
Below is a list of required hardware in order to create a connection between a VOXL-based device and a ground control station via. DTC BluSDR modems.
| QTY | Part Number | Description | Notes |
|---|---|---|---|
| 1 | MCCA-M0078-2 | VOXL USB Expansion Board v2 | Purchase |
| 1 | MCCA-M0041-B | Power Module v3 | Purchase |
| 1 | M0006, M0019, or M0054 | VOXL, VOXL-Flight, or VOXL2 | Purchase links: VOXL2, VOXL-Flight, VOXL |
| 1 | Ground station device | Computer, laptop, etc. | |
| 1 | Power source | Power supply for ground station modem | 5V Operating Voltage |
| 1 | USB-C cable | USB-C to USB on specified port on ground station | USB-C, A, etc. |
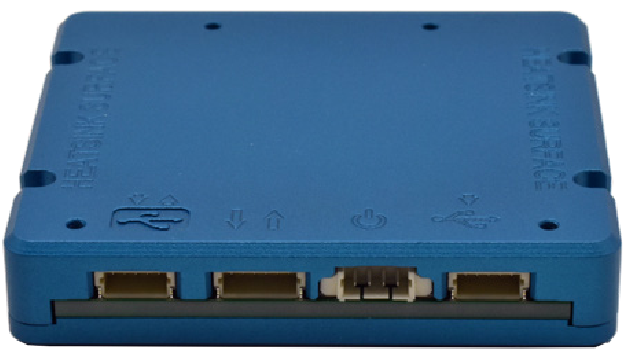
| 2 | BluSDR-6 Radio | DTC BluSDR-6 radio | Description |
| 2 | DTC Antennas | Cables, antennas |
VOXL Hardware Setup
Using M0078
Compatable boards include the USB Expansion Board with Fastboot v2 and the USB Expansion Board V1. Other hats should work as well, as long as they don’t have any other modems installed.
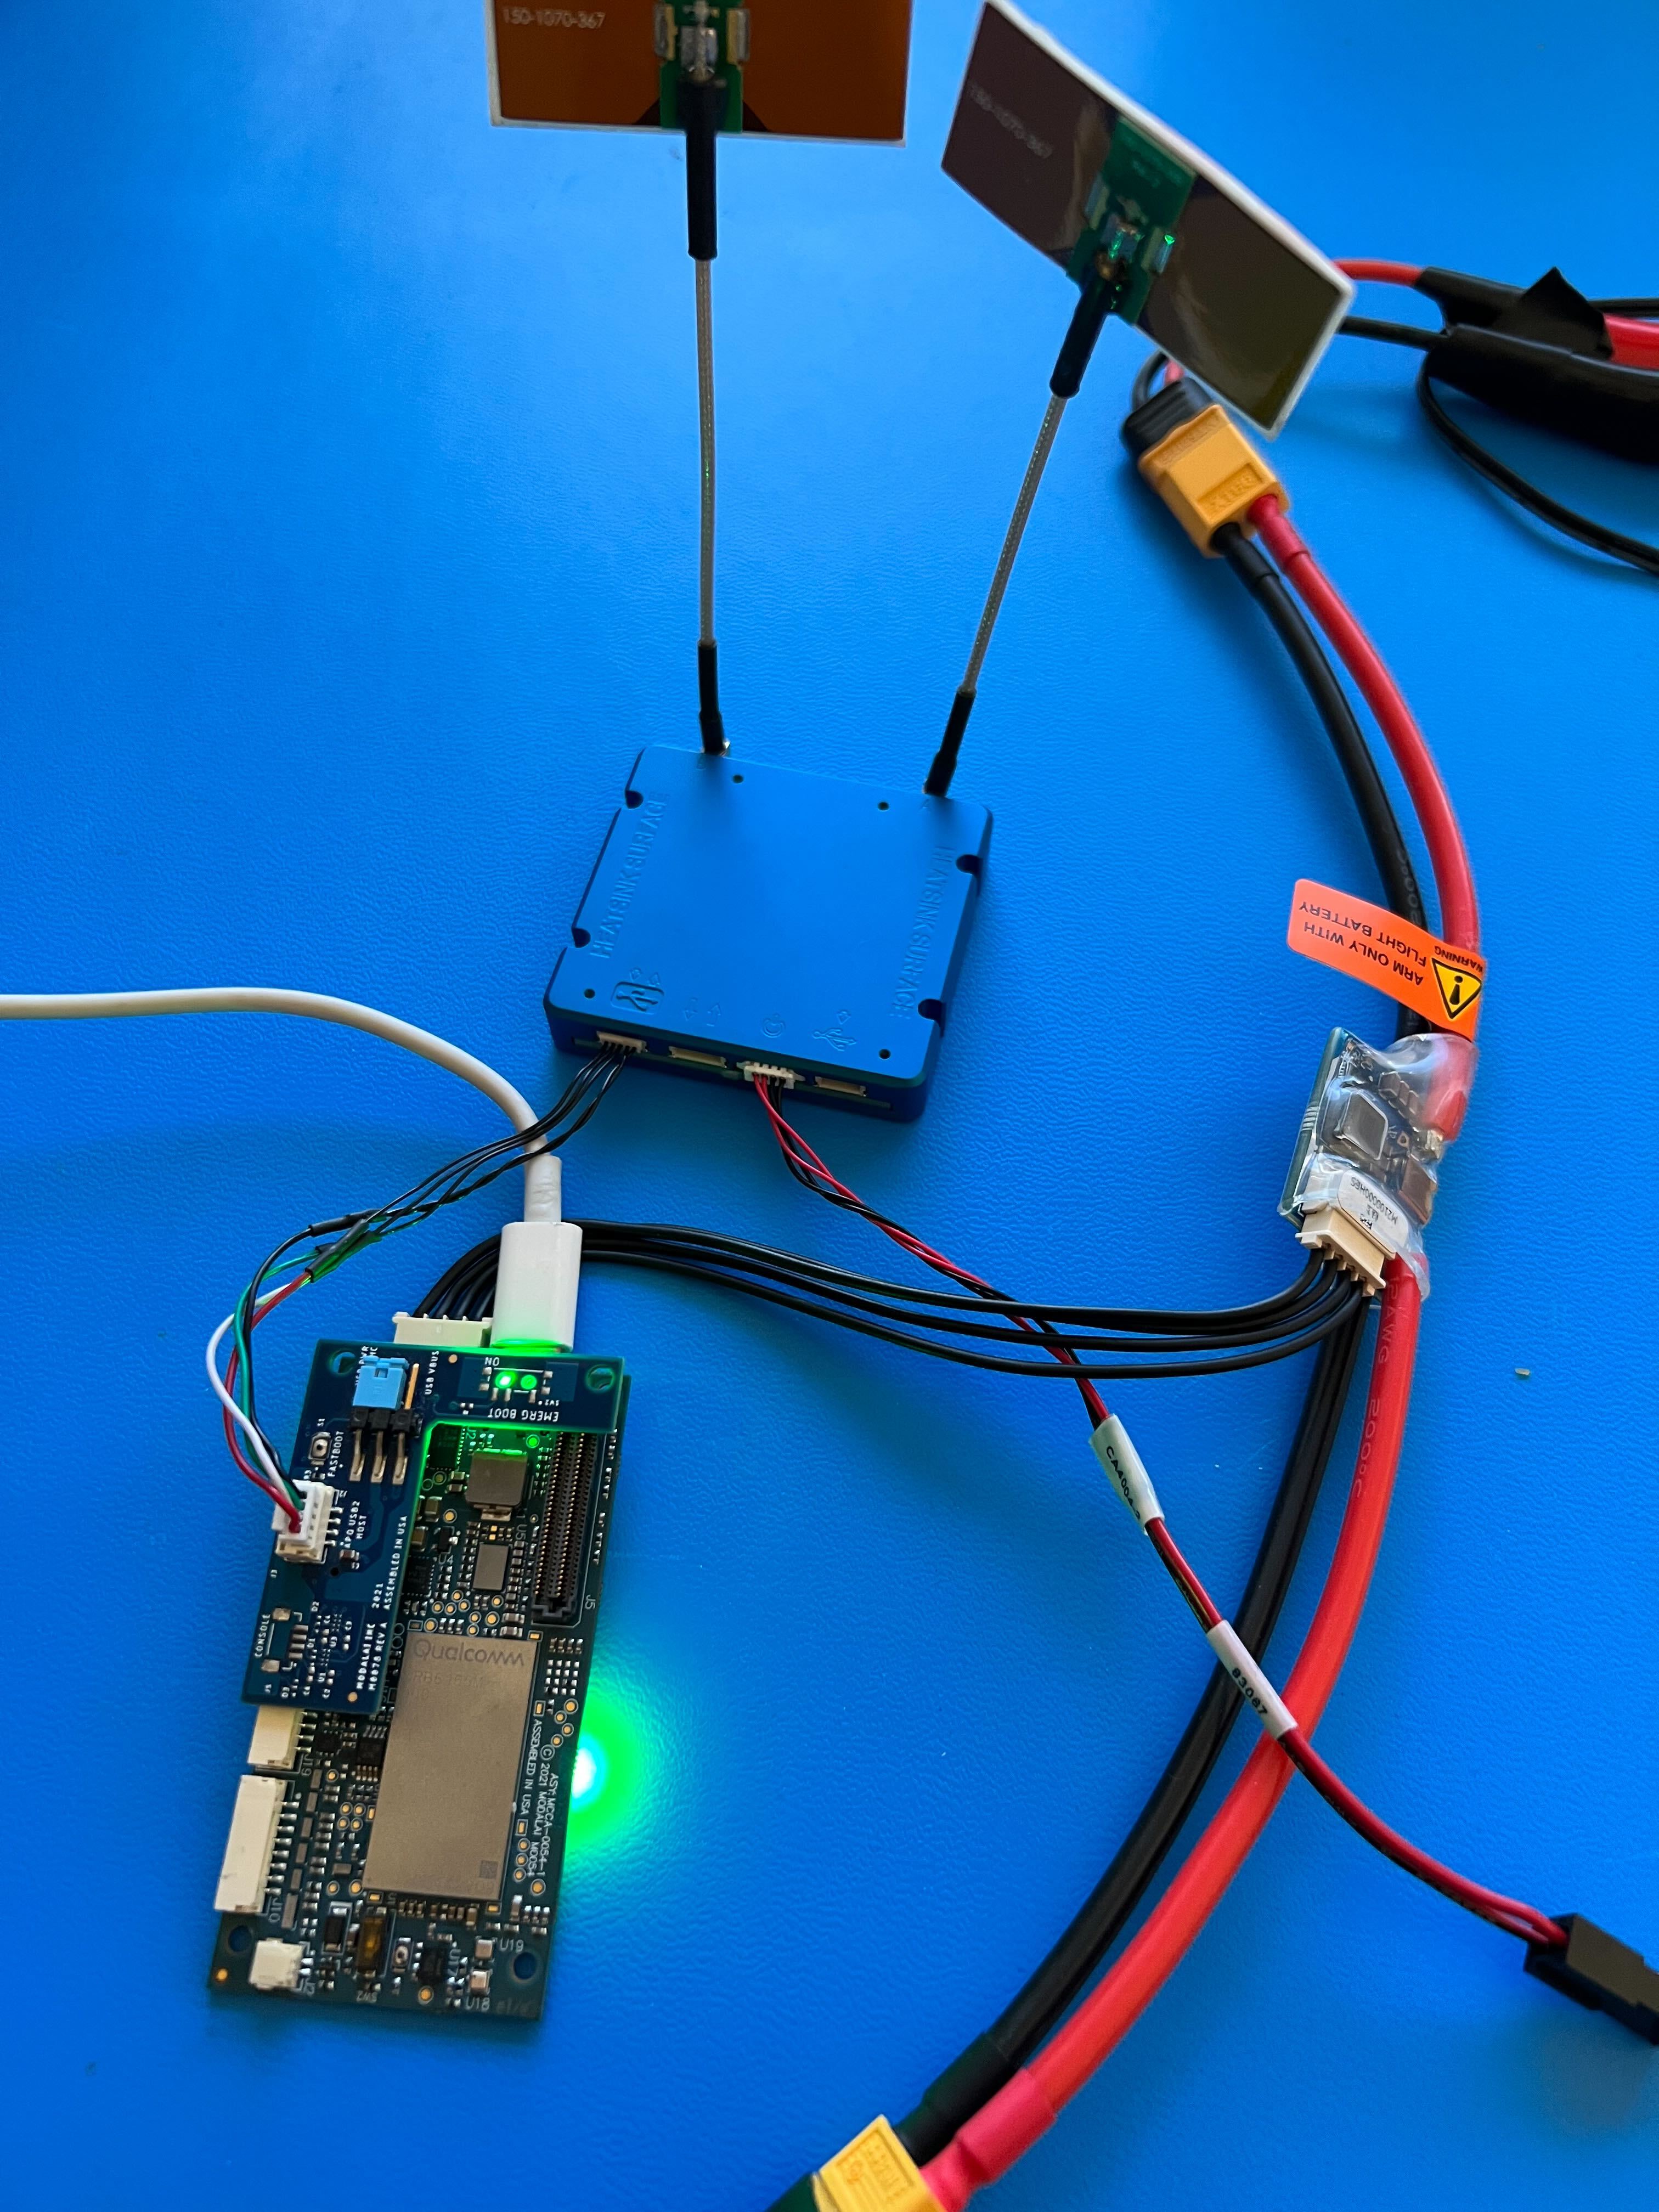
Pictured above for your reference is a VOXL2 flight deck with a DTC BluSDR-6 radio connected.
IMPORTANT! Before modifying hardware setup, ensure power is off or disconnected.
Attach
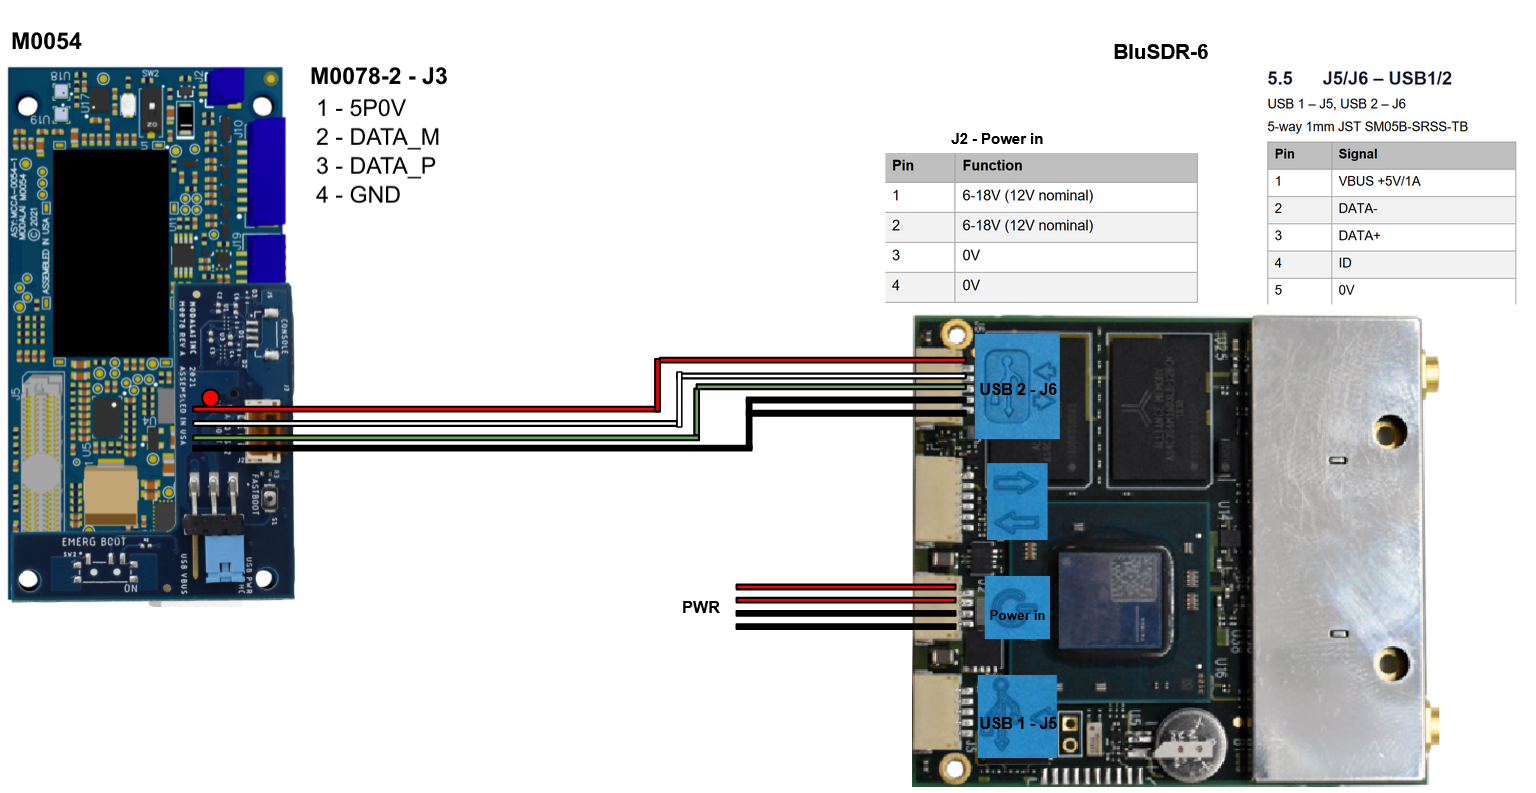
M0078add-on board toJ3ofVOXL2.Attach antennas to ports on BluSDR-6 radio.
Wire a
JSTaccordingly to be able to plug from the4-pin USBon theVOXL2 USB Expansion Boardto theUSB-2port on theDTC radio.Connect the
4-pin JSTon the VOXL2 to theUSB-2port on theDTC radio.
Note: You must connect to the USB-2 port on the DTC radio, and NOT the USB-1. The USB-1 port is used for host only, while the USB-2 is used for host/peripheral. The VOXL2 dtc connection must be peripheral, so USB-2 is required.
Attach
M0041APM to VOXL2 and provide powerProvide power to the DTC radio. It must be powered through the power port shown above.
Plug in
USB-C cablefrom desktop to VOXL2 in order to accessADBlater on.
Ground Station Hardware Setup
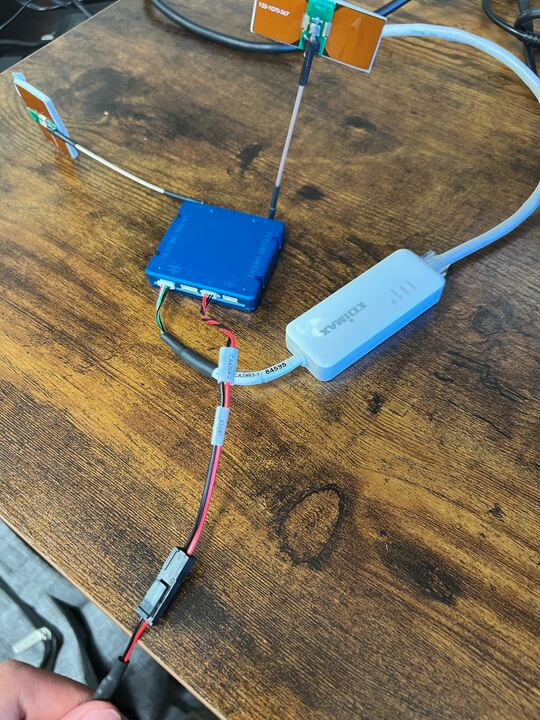
Pictured above for your reference is a ground station setup showing a DTC BluSDR-6 Radio and breakout board.
IMPORTANT! Before modifying hardware setup, ensure power is off or disconnected.
Attach antennas to ports on DTC radio
Plug in ethernet to USB into USB-2 port on DTC radio
Plug in power cord into Power port on DTC radio and plug into outlet
Plug ethernet from ethernet to usb to your computer. If your computer does not have an ethernet port, you can use another ethernet to usb on your computer side.
Software Setup
Configure Radios
You will need to be on a Windows computer and download DTC’s
Node Findersoftware from here.After downloading the Node Finder software, run it.
Hit the
reloadbutton until a radio shows up.
Warning: If no radio appears in Domo Node Finder, try disabling Windows Defender Firewall temporarily. Windows Firewall can block the UDP broadcast used by Node Finder to discover devices on the local network.

- As you can see, the IP address is
0.0.0.0. This is because it is currently in DHCP mode. But you want it to have a static IP so you can access the configuration page. Right click on the radio, clickConfigure Network, and assign a static IP for the radio.
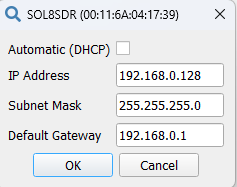
- Set a static IP address for the host PC in the same subnet as what you set for the radio. As an example:

In a web browser, enter the IP you set for the radio on
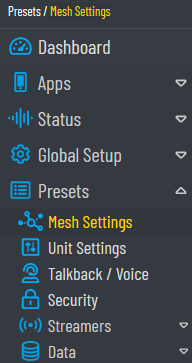
Domo Node Finder. A login screen should be brought up. Leave the username blank and enter “Eastwood” for the password. You should now be in the radio configuration screen.On the left navbar, go to Presets -> Mesh Settings
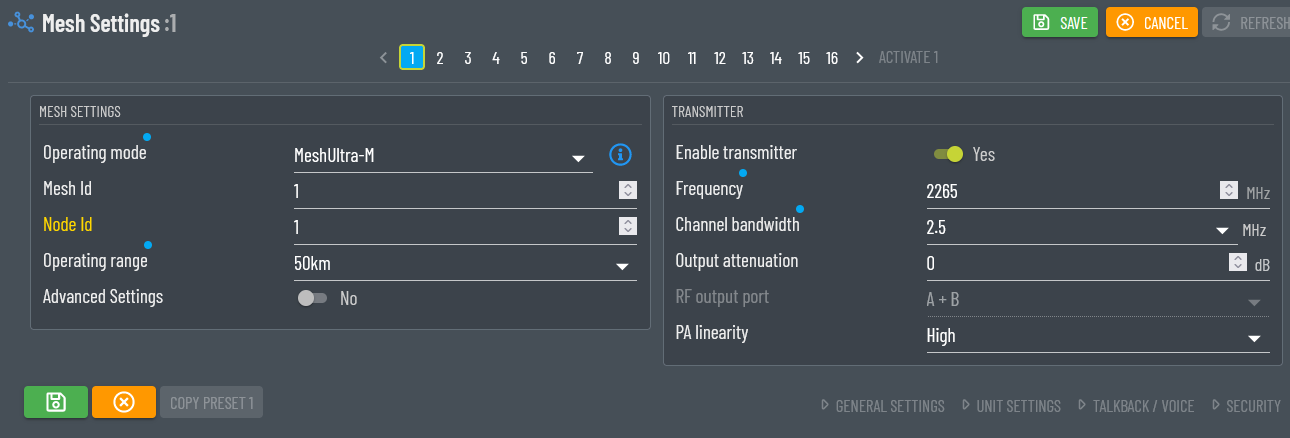
Mesh idshould be the same for all radios on the same mesh, so no need to change it.Node idshould be unique for each radio on a mesh network. By default is it set to 0. Set this radio’sNode idto 1.Check
Enable Transmitter. Set the frequency, PA linearity, and channel bandwidth to what is desired.Hit the save button to save the desired settings.
Once you are done, turn off the radio and swap it with the one you are going to use on the VOXL2 side. Temporarily wire the VOXL2 radio to your GCS computer so you can configure it.
Repeat the steps above for the VOXL2 radio, making sure to match the settings. Make sure the
Node IDon the VOXL2 radio is different than theNode IDon the GCS radio.Also make sure to make IP address of the second radio different than the first radio.
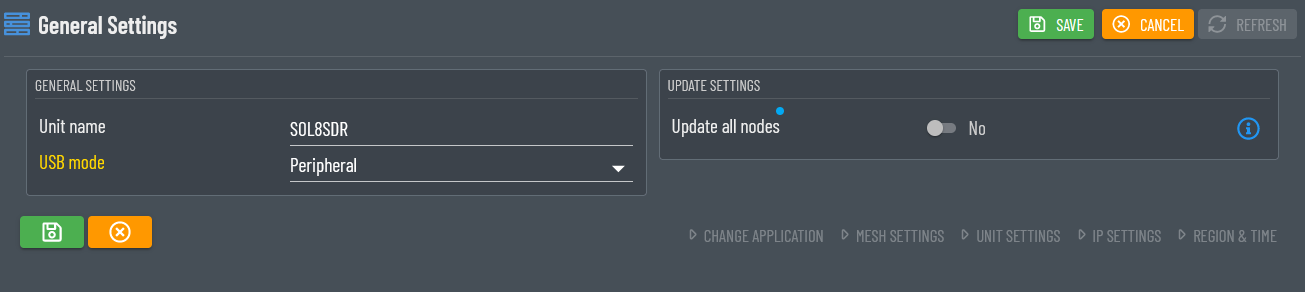
On the VOXL2 radio, make sure to go to
Global Setup->General Settingsand setUSB ModetoPeripheral. If you fail to do this, the radio will NOT show up as a USB device when connected to the VOXL2 and will never be configured.
- After you are done configuring the settings for both the VOXL2 and host computer radios, you can plug the VOXL2 radio back to the VOXL2 and then turn both radios on and look in “Domo Node Finder” to confirm both are found. You can also look in the configuration page to see if there are multiple nodes on the mesh. Look at the
Network Statusto see how many active nodes there are.

VOXL2 Software Setup
- adb onto VOXL2
adb shell

voxl2:/$
- Run the following the begin modem setup:
voxl2:/$ voxl-configure-modem

What type of modem are you using?

If you are unsure of which modem you have, take a look at the following datasheets:

v2 LTE Modem: https://docs.modalai.com/lte-modem-and-usb-add-on-v2-datasheet/
Microhard Modem: https://docs.modalai.com/microhard-add-on-datasheet/

1) v2
2) microhard
3) dtc
4) doodle
5) quectel
6) em9191
- Select
dtcfrom the menu
#? 3

Enter the IP address you would like to the VOXL to use on the DTC network:
Note: The chosen IP address must be of the form: 192.168.0.XXX

Default - 192.168.0.100

1) default
2) custom
- Select the static IP you would like your VOXL2’s
usb0network interface to be set to, either choose default or another IP on the192.168subnet
#? 1

Making new interface file /etc/network/interfaces

qrb5165 based device detected
reloading systemd services
enabling voxl-modem systemd service
starting voxl-modem systemd service
DONE configuring voxl-modem
The VOXL2 will now enable the
voxl-modemservice in order to enable the bluSDR radio connection and set the static IP on bootupVerify that the
usb0network interface has enumerated and that the IP has been set correctly:
voxl2:/$ ifconfig usb0
usb0: flags=4163<UP,BROADCAST,RUNNING,MULTICAST>  mtu 1500
        inet 192.168.0.100  netmask 255.255.255.0  broadcast 192.168.0.255
        inet6 fe80::4150:d5f3:7861:747a  prefixlen 64  scopeid 0x20<link>
        ether 0a:a6:a8:f6:48:69  txqueuelen 1000  (Ethernet)
        RX packets 312  bytes 18106 (18.1 KB)
        RX errors 0  dropped 0  overruns 0  frame 0
        TX packets 725  bytes 65407 (65.4 KB)
        TX errors 0  dropped 0 overruns 0  carrier 0  collisions 0
Ground Station Software Setup
- As already shown above, you have set the Ground Station static IP address.
In this case, the IP address of the host PC was set to 192.168.0.150
Connecting to QGroundControl
Now that both the VOXL side and ground station side software have been setup you should be able to ping one device from the other.
For example, one can ping the host computer radio by doing the following (assuming the DTC radio on the host computer has the IP address of 192.168.0.128):
voxl2:/$ ping 192.168.0.128
PING 192.168.0.128 (192.168.0.128): 56 data bytes
64 bytes from 192.168.0.128: icmp_seq=0 ttl=64 time=48.223 ms
64 bytes from 192.168.0.128: icmp_seq=1 ttl=64 time=66.942 ms
64 bytes from 192.168.0.128: icmp_seq=2 ttl=64 time=63.329 ms
64 bytes from 192.168.0.128: icmp_seq=3 ttl=64 time=54.784 ms
64 bytes from 192.168.0.128: icmp_seq=4 ttl=64 time=43.811 ms
Or one could ping the VOXL2 from the host computer by pinging the VOXL2 IP from command prompt:
C:\Users\john>ping 192.168.0.100

Pinging 192.168.0.100 with 32 bytes of data:
Reply from 192.168.0.100: bytes=32 time=29ms TTL=64
Reply from 192.168.0.100: bytes=32 time=52ms TTL=64
Reply from 192.168.0.100: bytes=32 time=44ms TTL=64
Reply from 192.168.0.100: bytes=32 time=43ms TTL=64

Ping statistics for 192.168.0.100:
    Packets: Sent = 4, Received = 4, Lost = 0 (0% loss),
Approximate round trip times in milli-seconds:
    Minimum = 29ms, Maximum = 52ms, Average = 42ms
You may have difficulties pinging the host computer itself from the VOXL2. But if you can still ping the host computer radio IP from the VOXL2 and the VOXL2 IP from the host computer, you are good.
Since we are able to get packets from drone to ground station we can now connect our VOXL2 / drone to QGroundControl.
The VOXL system uses the voxl-mavlink-server service on VOXL to establish a connection between PX4 and QGroundControl over UDP. This is supported on VOXL2, VOXL Flight or when using Flight Core with VOXL.
If you have not yet setup voxl-mavlink-server on your VOXL, do the following:
# On Host PC
$ adb shell

# On VOXL
voxl-configure-sku -w

voxl-configure-mpa
Trouble Shoot
If you do not see the IP address change for USB0 then you should enter the following command: voxl-configure-modem dtc. This will reset the config file for the VOXL2 to include the flag for dtc addresses. Then run ifconfig USB0 again to see if the IP address for USB0 is set to the default IP address.