Orqa/GHST Setup
Table of contents
- Orqa FPV.Ctrl with Ghost UberLite Module
- ImmersionRc Ghost xLite Module
- ImmersionRC Ghost JR Module
- ImmersionRC Ghost Atto Receiver
- Extra Information
- Here is a general link to the Orqa help website if something isn’t on this page.
- This is a link to the ImmersionRC Ghost Manual, which seems to cover everything Ghost related. Here is a pdf of the same thing.
- The quickstart guide is also useful.
Orqa FPV.Ctrl with Ghost UberLite Module
![]()
Key points: Updating, Pairing, Binding
This FPV.ctrl Manual is a good source if something is not yet explained here.
Updating
- Orqa has a guide for this already, hosted on this Google Doc. Here is a pdf download as well (version 1.0.8.3)
- The Orqa Transmitter has a separate firmware from the UberLite Module, and that is the only thing able to be updated through the app. As of 02/2024, the current version for the Orqa Transmitter is 1.0.4. To get the up to date firmware on the UberLite Module, you will need to follow the steps in the pdf above.
Pairing to App
- Will depend on your device of choice, connect your transmitter to your device via bluetooth. The app should walk you through this once opened.
Binding
Download Orqa FPV.ctrl app from your phone or tablet’s app store
Open app, connect to transmitter, and then enter the “Ghost Menu”
If this is a new receiver, it will automatically be in bind mode. To get a previously bound (to a different transmitter) receiver into bind mode, power up the receiver and then press the button next to the antenna connector within 30 seconds. The light should turn blue to indicate searching for transmitter.
Go through the settings and choose which modes you want, then click “Bind”
In this menu, choose which protocol you want, it is recommended to use GHST. Rx ID does not matter unless you will have multiple drones flying at once.
Click on “Start Bind.” After a brief moment it should say “Success”
Congratulations, you are now bound. It is recommended to restart the drone and transmitter/app at this point.
- Alternative Bind: If you do not want to use the app and do not have a need to change modes or settings of any sort, you can power on the Orqa transmitter, then press it’s button on the back (On the antenna module) and it should turn blue, indicating binding mode. Couple this with the binding mode of the receiver and they should both go through a series of colors and flashes before turning solid green each.
ImmersionRc Ghost xLite Module
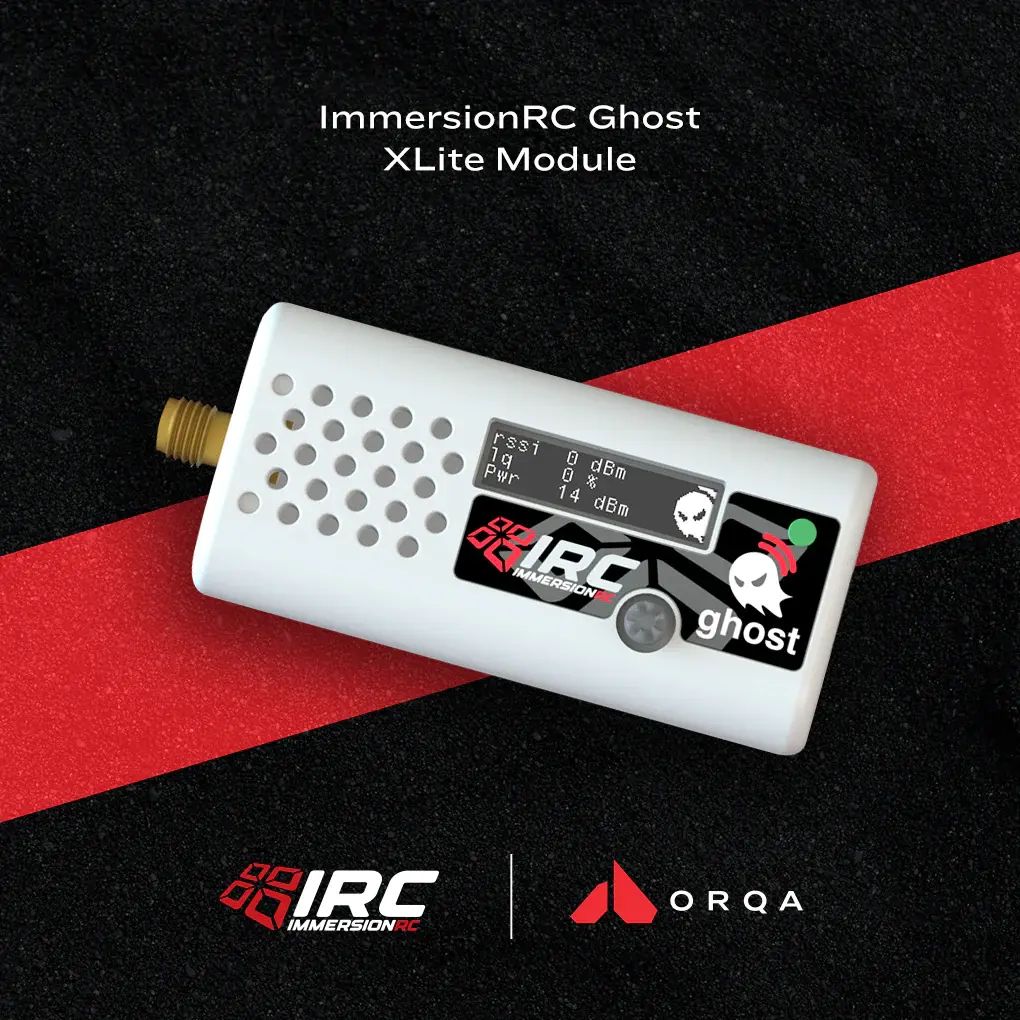
Key points: Installing, Updating, Binding
Installing:
This can be installed in transmitters with Lite module bays such as the Taranis X9 Lite or TBS Tango 2 (with module bay mod). Each transmitter is different, but will usually require you to remove the plastic cover of the external module bay, and then slide in the Ghost xLite Module. That is the installation.
To use the GHST Protocol, the transmitter will need to be updated to at least OpenTX 2.3.10, which is the first firmware to support GHST transmission. (As of 02/2024, most up to date firmware is 2.3.15). Again, this updating process is entirely dependent on what transmitter you have. Most have detailed guides online.
Ghost is fully supported in 2.3.13 and later.
If not using a firmware at or beyond 2.3.10, SBus may be used on 2.3.09 and below by selecting SBus in the External Module protocol setting.
Updating:
To update the module, it must be connected to a Windows or MacOS computer with the Ghost Updater/Installer installed. A link to download what will hopefully be the most up to date installer can be found in the “Firmware/Downloads” Tab, then “Utility Software” section near the bottom of This Page.
On Windows, download (From the same place as above) and install the drivers, then open the installer. As of this guide, 1.8.0 is the latest version.
For Mac, download the installer, no drivers necessary.
Plug in the Module via usb, run the installer and verify the program sees the module on the correct COM port, this was automatic for me. Then click the ‘Update Ghost’ button. It should automatically have the latest firmware selected if connected to the internet.
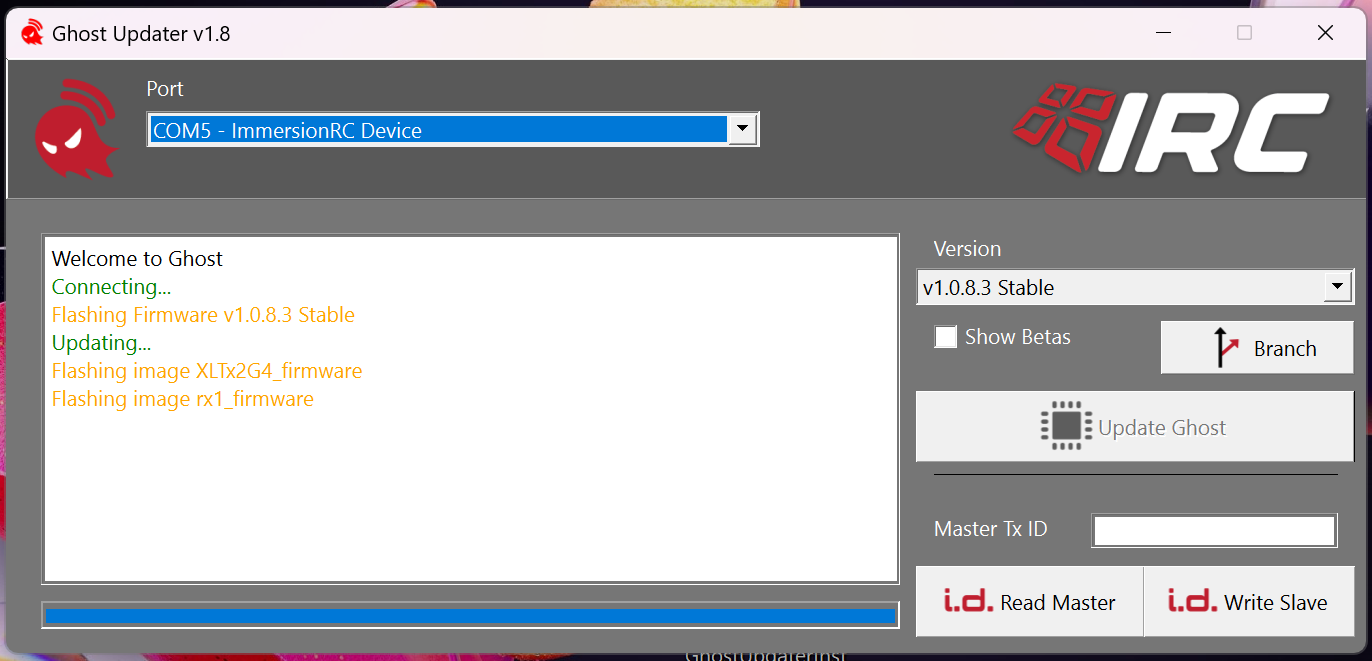
It will take a minute or two to finish the update, then give a success message.
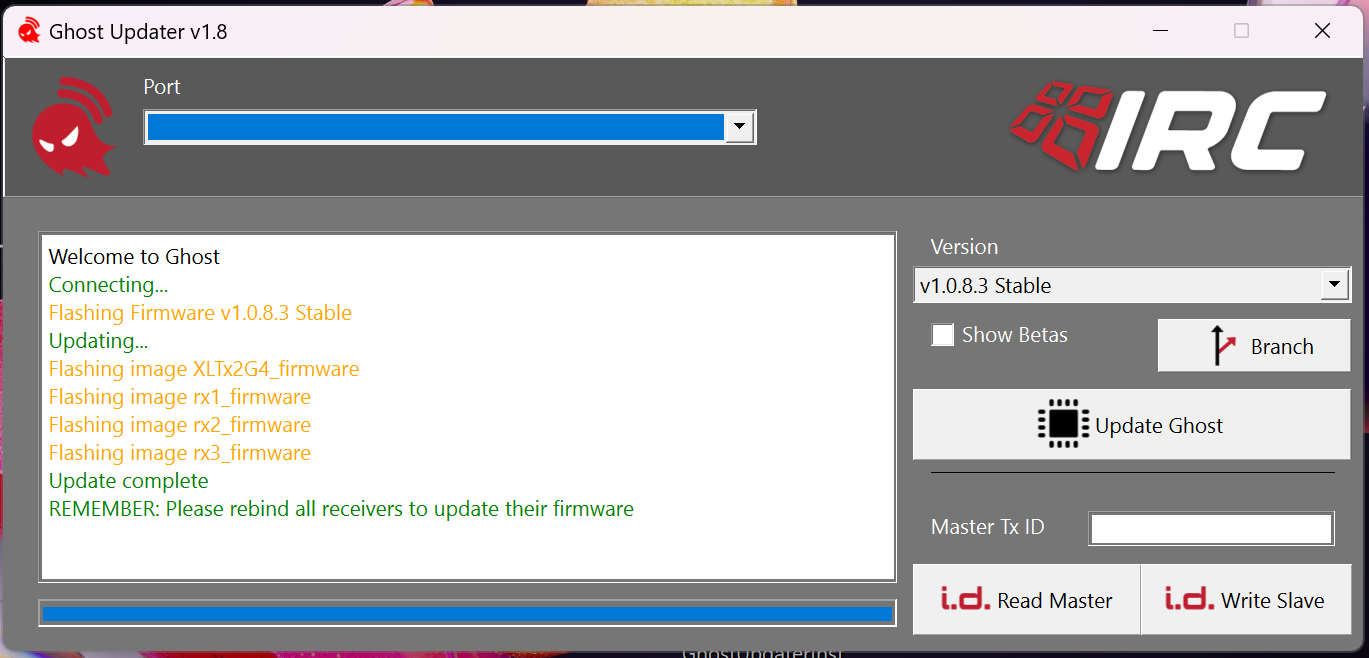
This will also give the module the ability to update any receivers it connects to the latest firmware as well.
If you have already bound to receivers with this module, rebind to them to update their software. If a receiver is on an older version, it will automatically update when binding. (This at one point was a separate step, but has been since streamlined and no longer needs that).
Binding
- The Ghost PDF explains its capabilities well:
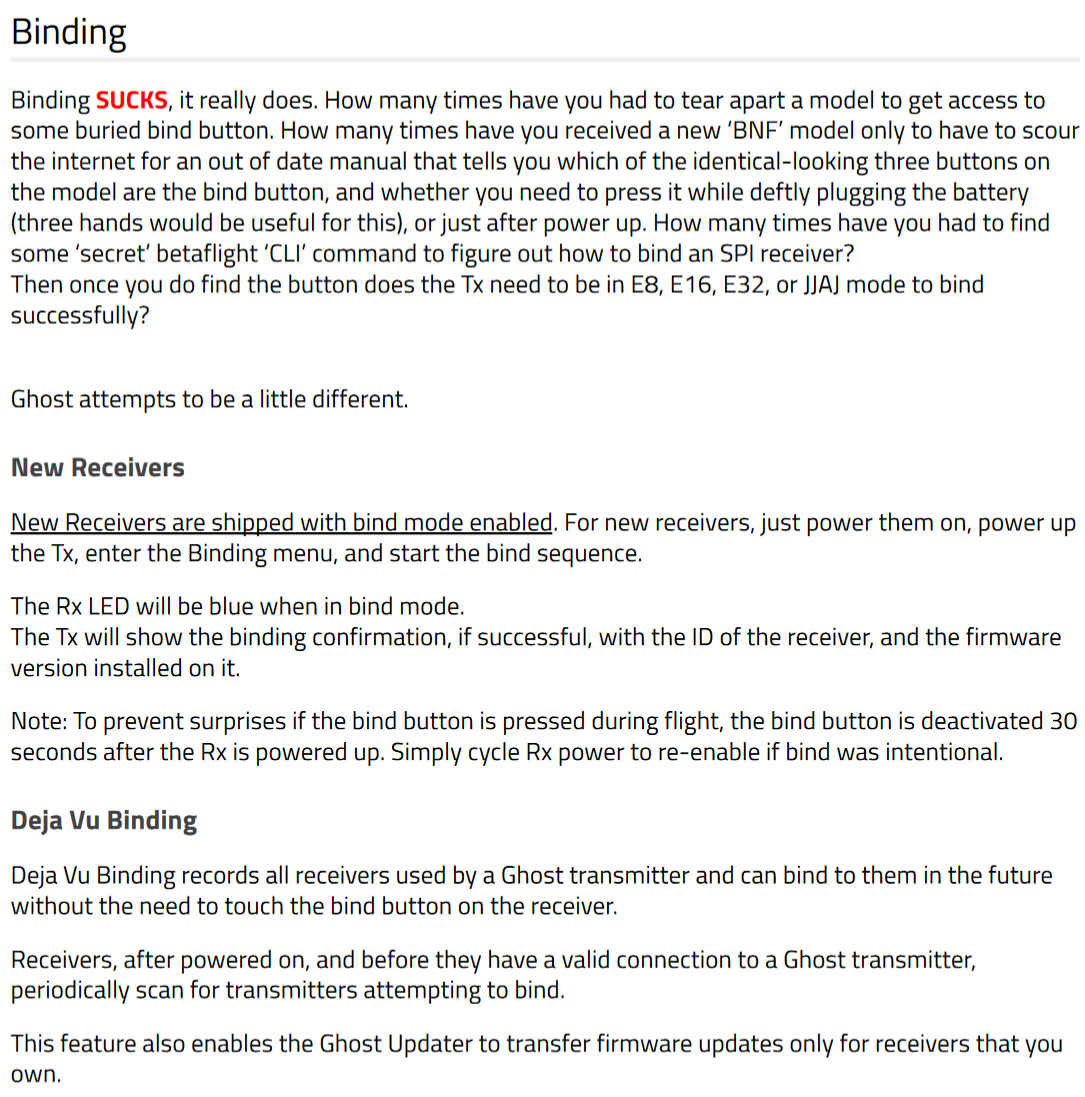
ImmersionRC Ghost JR Module
This is nearly identical to the xLite module, but fits into larger module bays and has a larger screen. Software and navigation are the same, with exception to settings involving the use of the two antennas compared to the xLite’s one. Installation should be the same as any other JR Module, simply remove the bay cover and push the module into the bay.
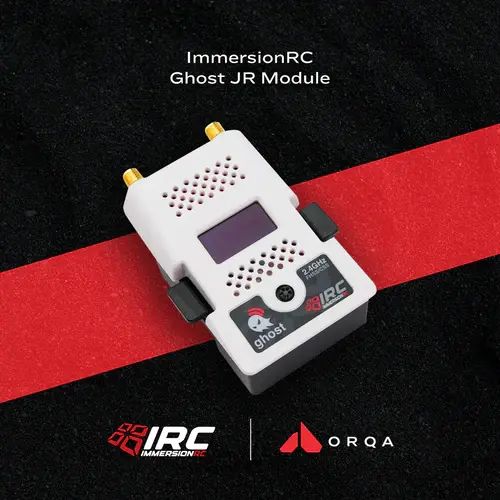
ImmersionRC Ghost Atto Receiver
This is the main Ghost receiver we use and will bind with any of the above systems.
Connecting to Voxl/Flight Core
Voxl 2
Make sure you have the receiver connected to the proper port and pins (See “Pinout” below)
Before it will communicate with the Voxl, there will need to be a change in the “voxl-px4.conf” file
- RC_Input needs to be set to “GHST” if it isn’t already. This file lives on the Voxl in /etc/modalai/
Voxl Flight / Flight Core V1/ Flight Core V2
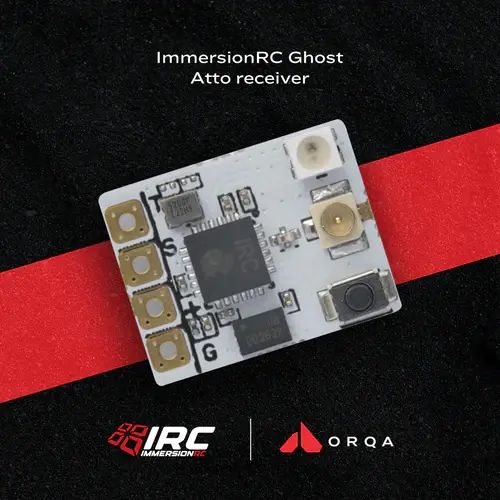
- For Voxl-Flight:
Use MSA-D0001-1-02, plugged into J1003 and J1004, as shown here:
Select “GHST” in QGroundControl under the “RC_INPUT_PROTO” parameter.
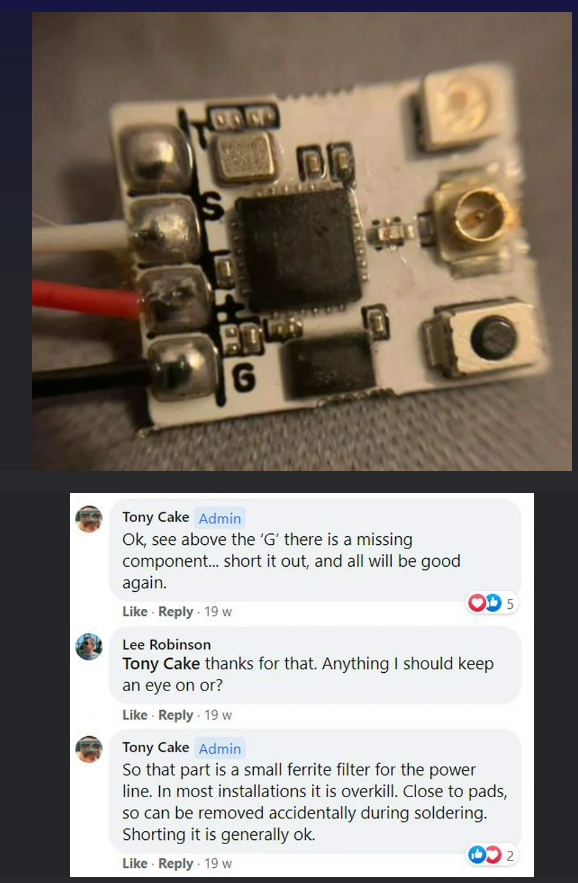
Pinout is as follows: (Connects to)
- J1003 Pin 1- 5VDC (“+” on Atto)
- J1003 Pin 3- GND (“G” on Atto)
- J1004 Pin 2- USART6_TX (“S” on Atto)
- For Flight Core V1 and V2:
- Not yet documented, coming soon.
Extra Information
Updating, Pinout, LED Indicator Lights, Atto Dimensions, Misc
Updating
- If using any of the above transmitters, the Atto, Atto Duo, and Zepto receivers should all automatically check and update (if necessary) on a bind to an updated transmitter.
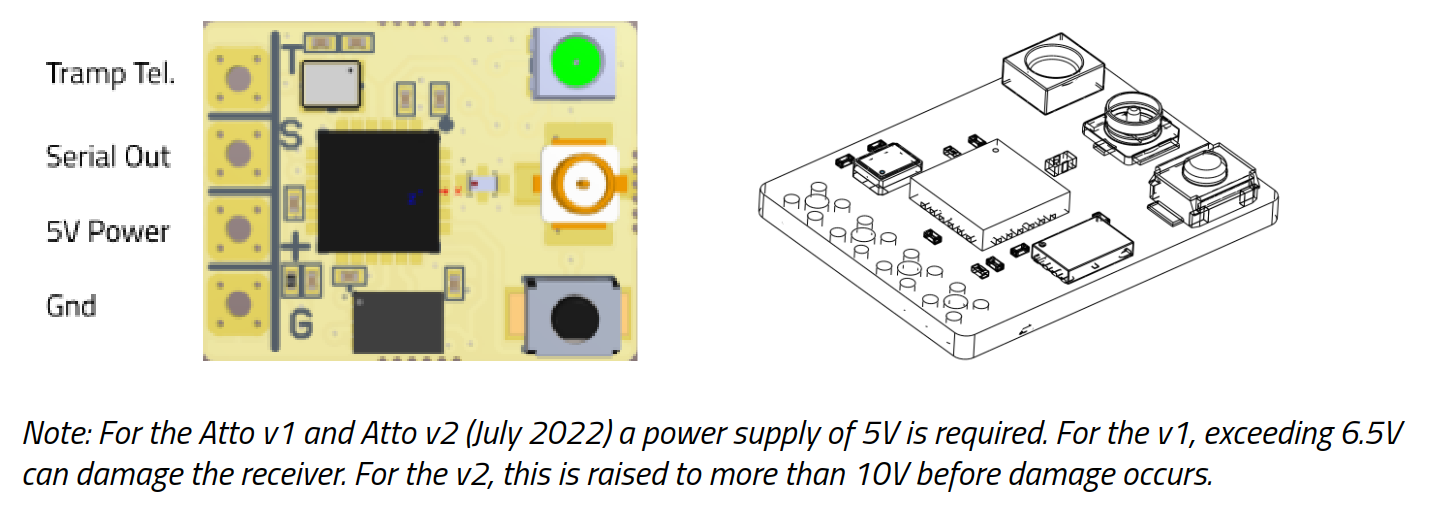
Pinout
This is the Pinout for the Atto, it is the same on the Zepto and Atto Duo.
The Atto has one U.FL antenna, Duo has two U.FL antennas and the Zepto has a standard MHF4 antenna. All of them are 2.4gHz.
Connecting to a Voxl 2 should be as follows: Gnd to Gnd, 5v to 5v (It may tolerate 3.3v at potentially reduced performance, ModalAi has not tested this.) and Serial Out to Rx.
We have not had any issues with having Tramp Telemetry connected to Tx, which allows utilization of ELRS receivers as well without swapping cables if connecting via MCBL-89-01 using the plug and play Harwin Rectangular Connector.
ModalAi drones will only come with the Gnd, 5v, and S connected. T will be open.
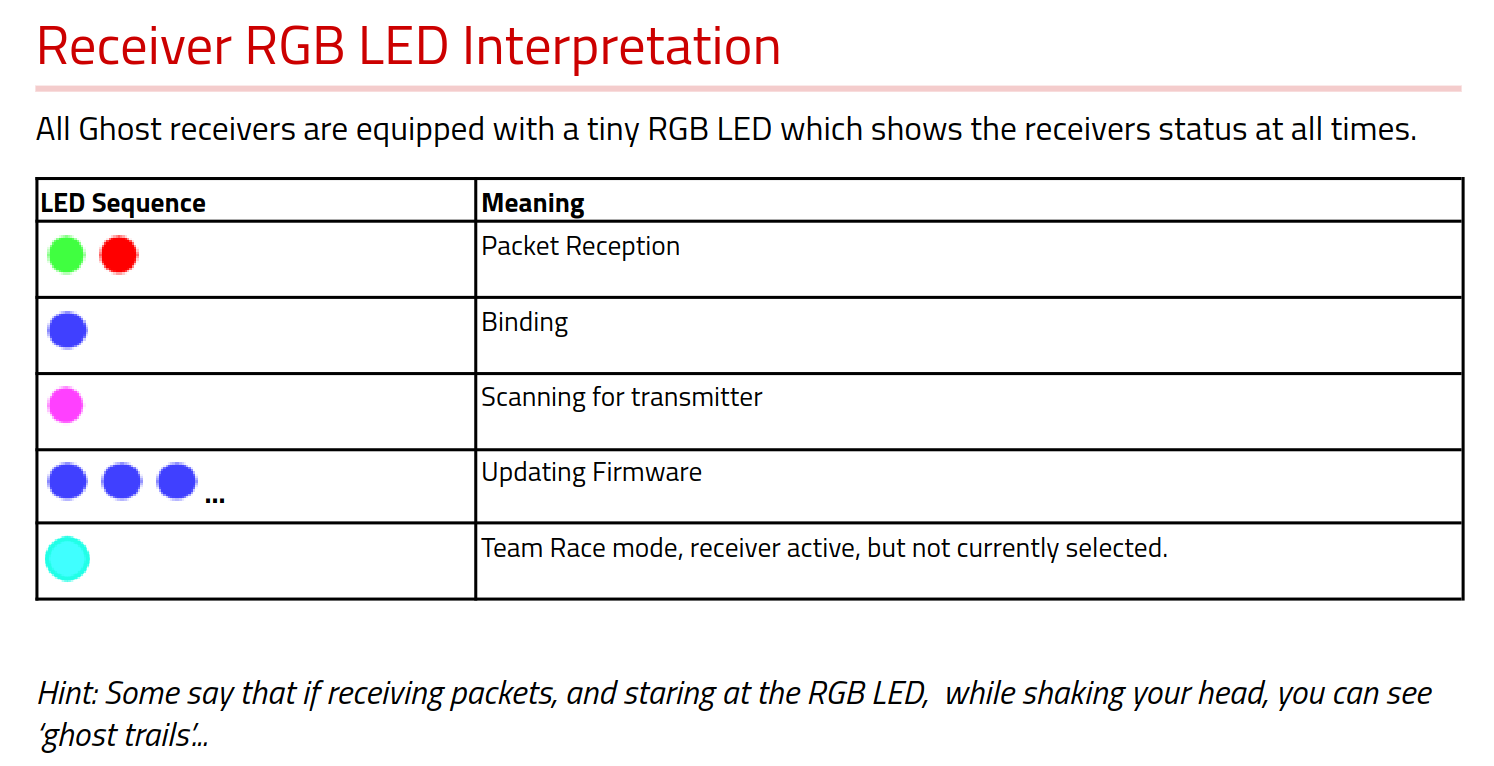
LED Indicator Lights:
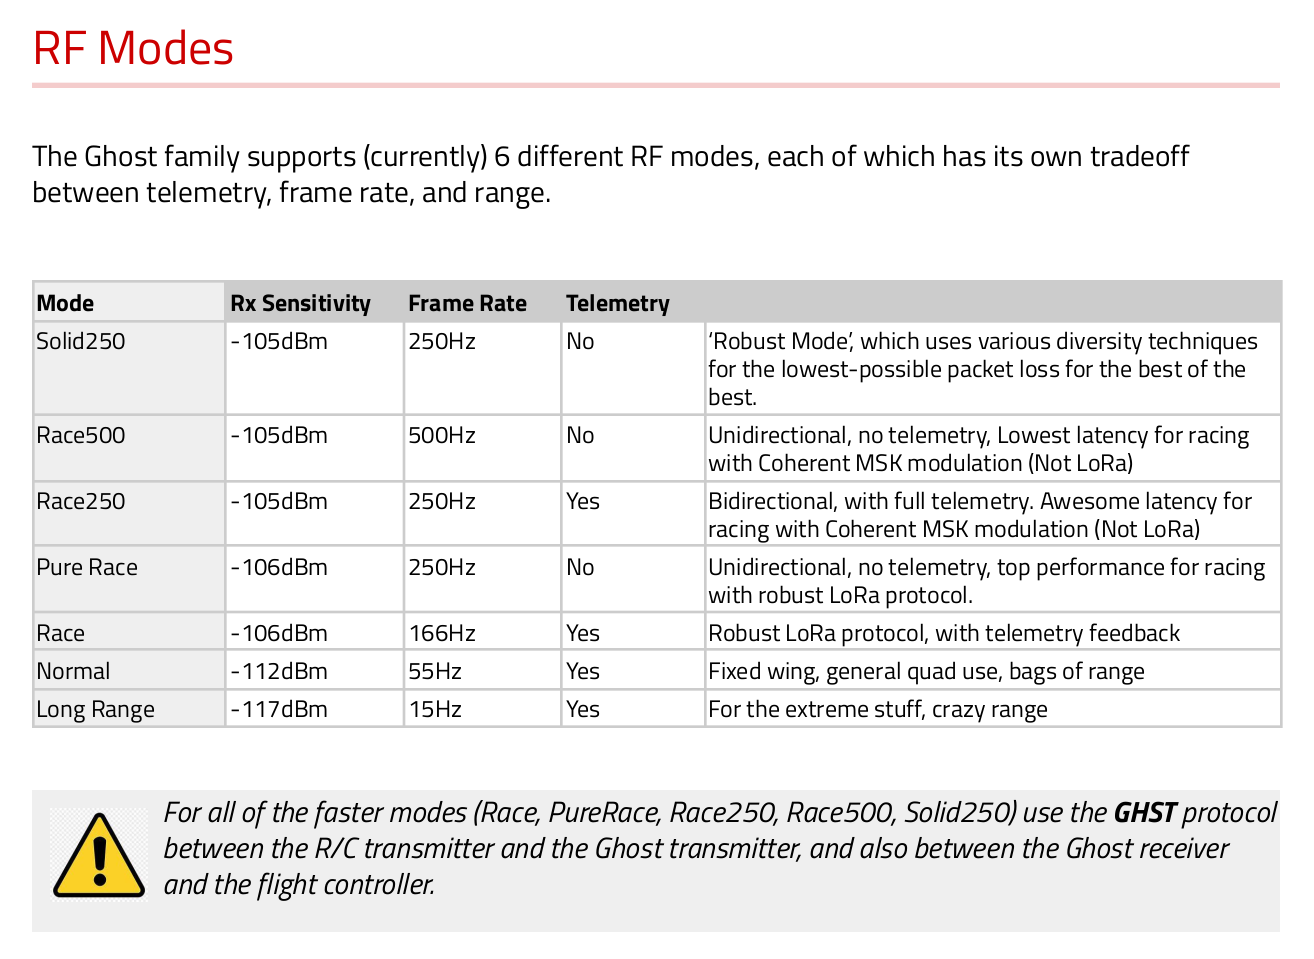
RF Modes:
- ModalAi suggests using Race Mode for optimal performance (while still retaining some range and telemetry) in non long range scenarios. In some edge case use, normal mode will ‘lag’ a bit as it uses a much lower frame rate.
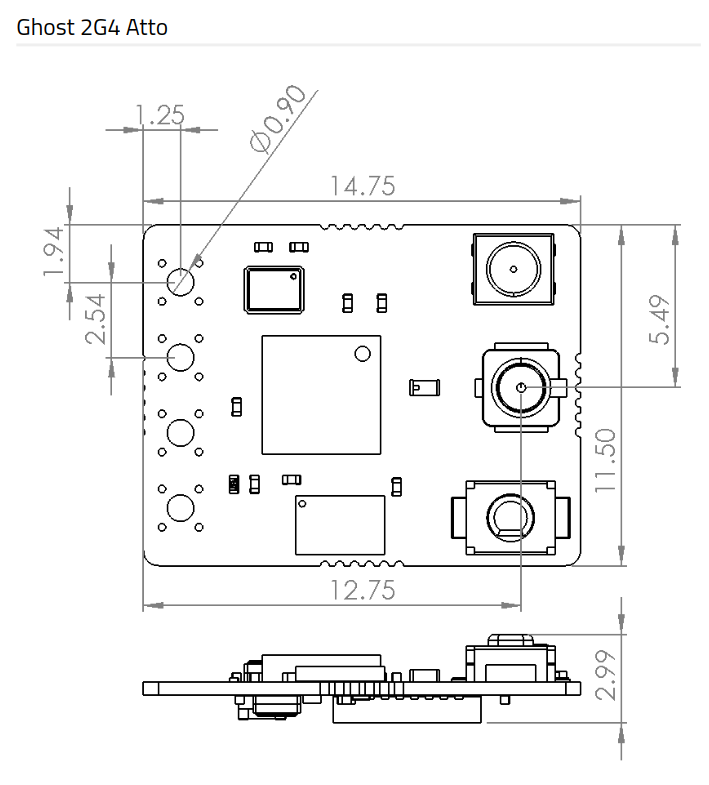
Physical Dimensions of Atto:
Miscellaneous:
- Something ran into during testing is a short or total removal between two small pads between the 5v and Gnd pads. If these are messed up, the receiver will flash Red and then Yellow multiple times on repeat. This has been documented on reddit by hobbyists.